1 min read
How to Hack Your Xero Chart of Accounts to Increase Profit
Have you ever looked under the hood of your car and marveled at how all those parts work together to get you from Point A to Point B? Your business's...

A journal entry is a means of manually recording transactions and adjustments to your Xero accounting file. Some main reasons for posting a journal entry may be to record expenses made on personal cards, record prepaid expenses, or record a recurring expense, such as a rent reimbursement.

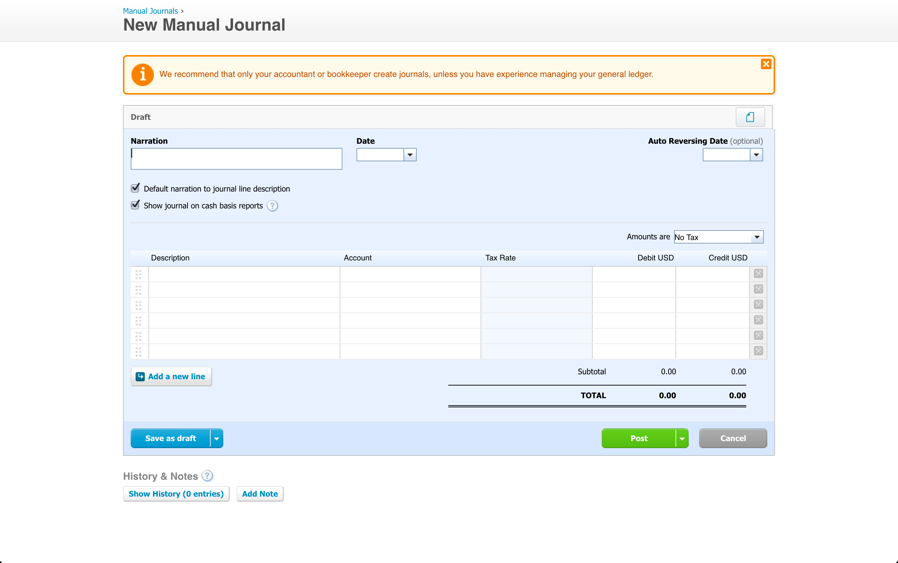
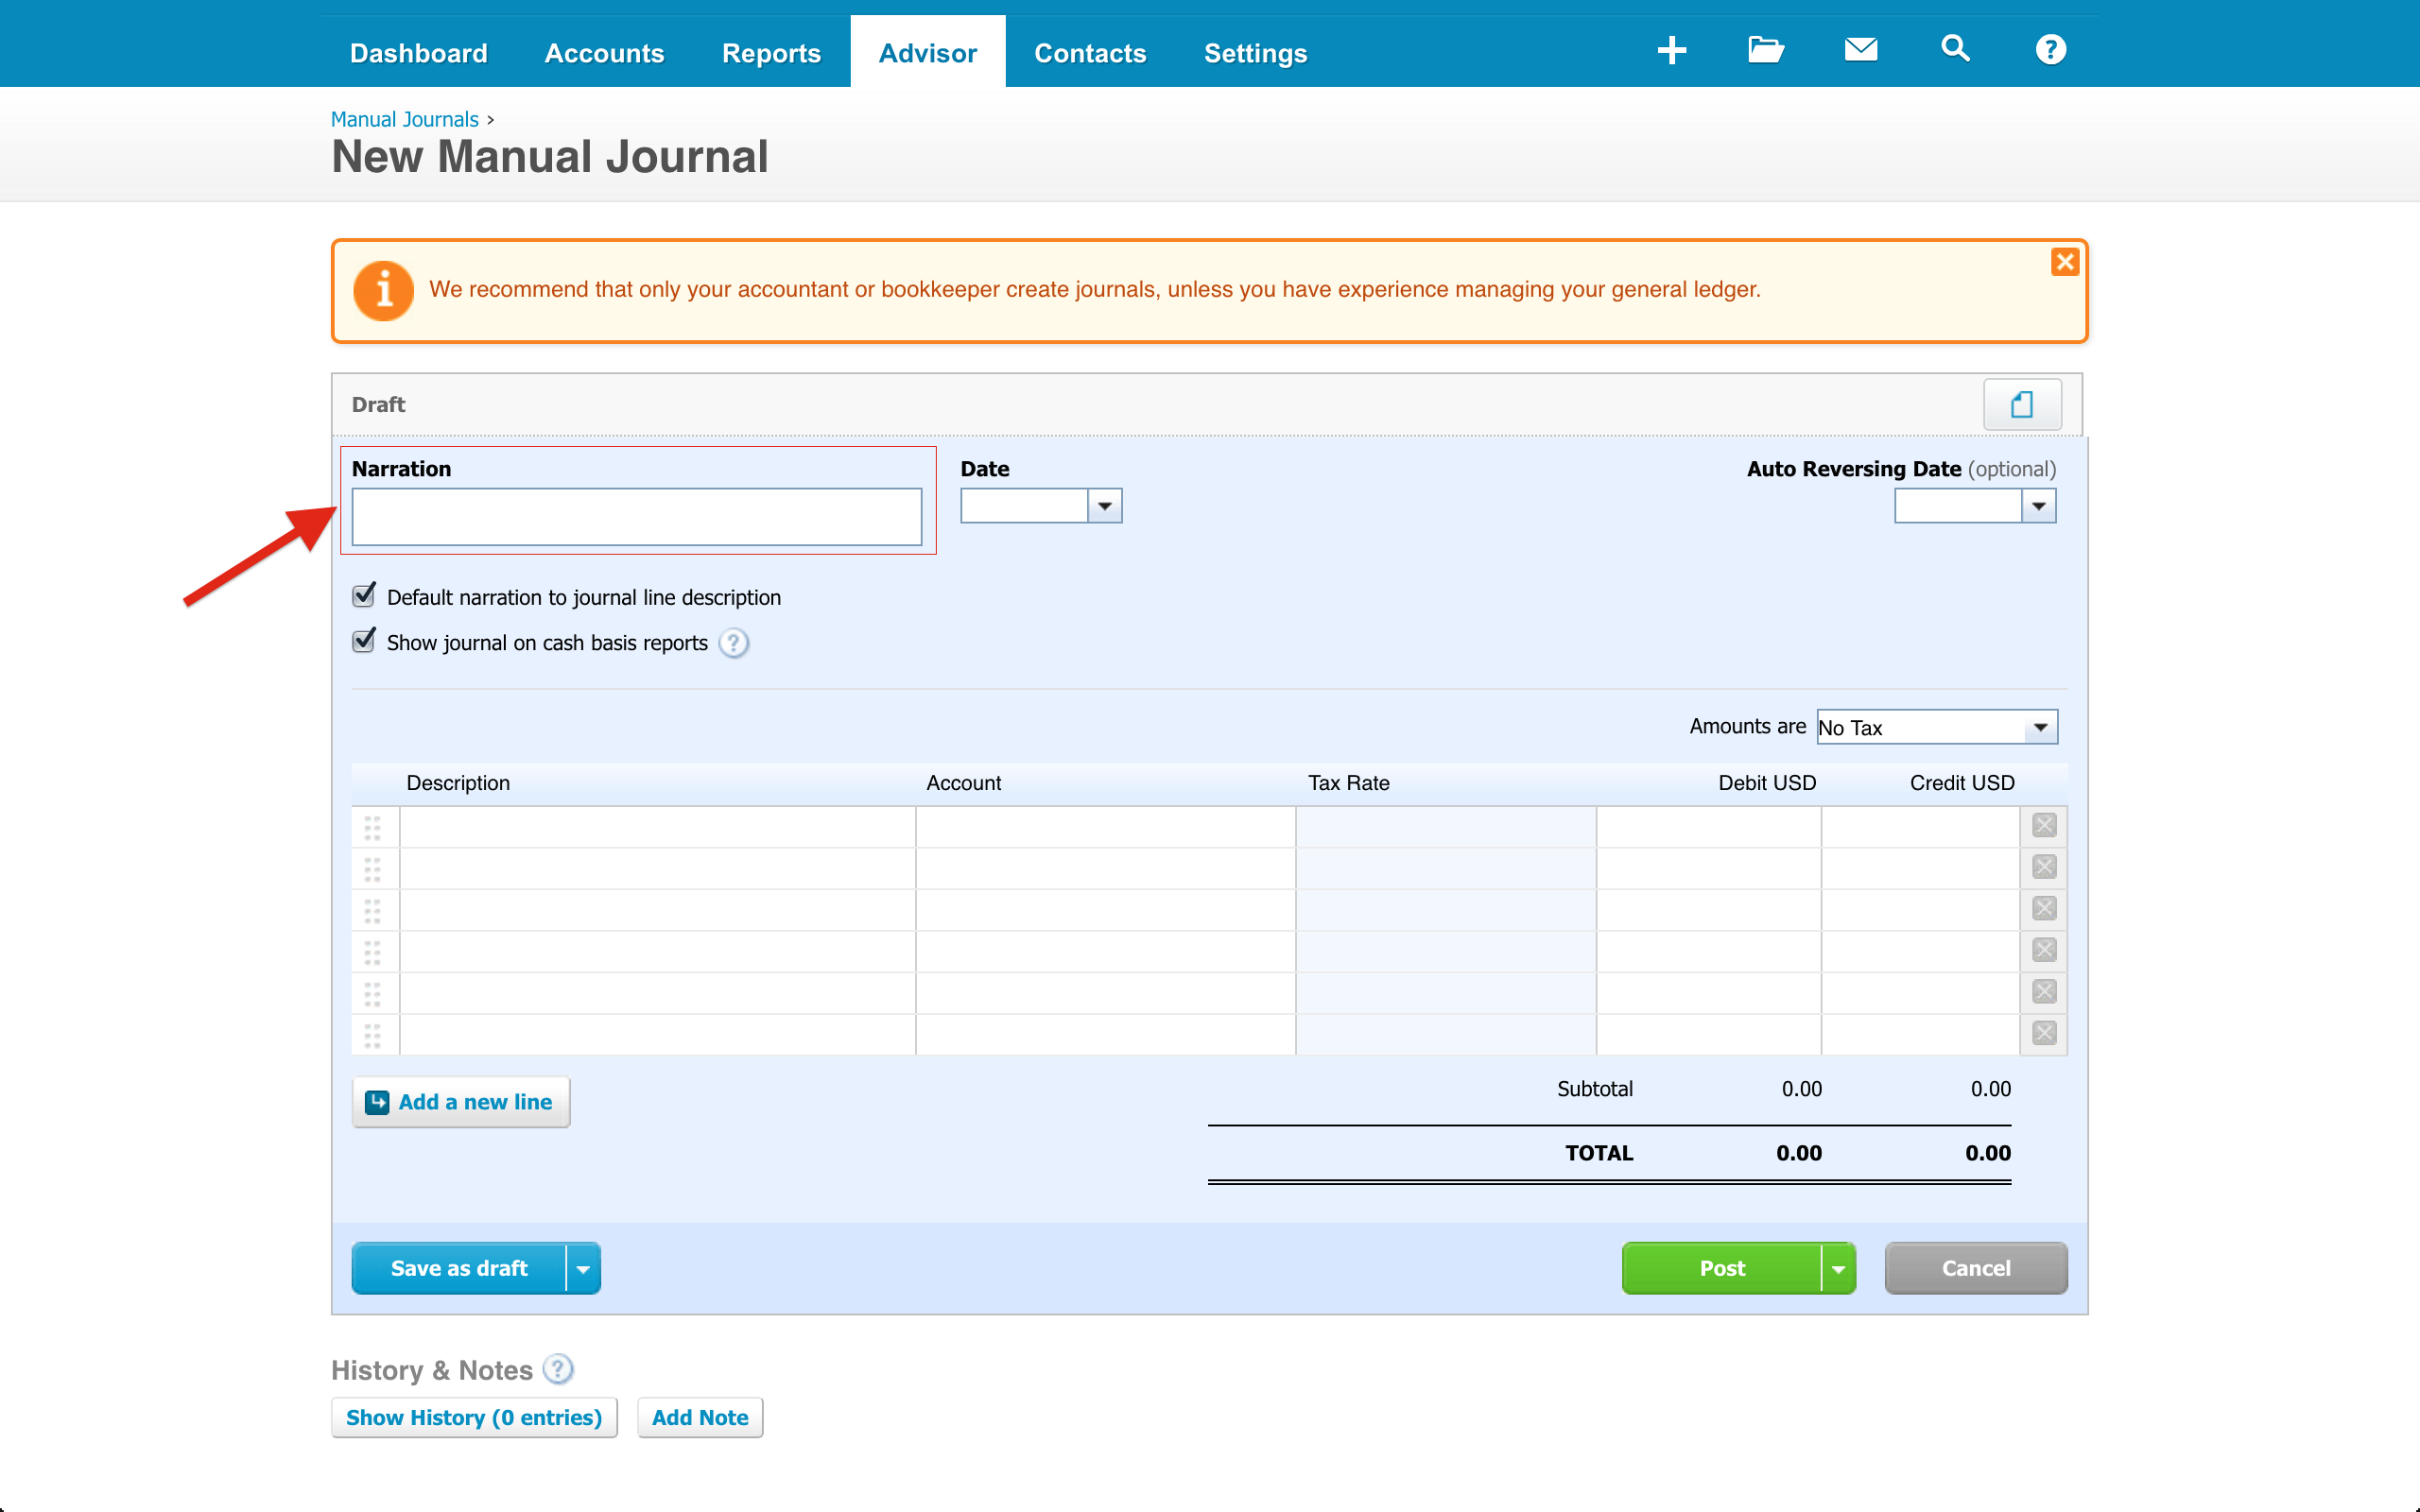
A basic journal entry will include a Narration (title), Date, Auto-reversing date (if applicable), line item descriptions, accounts, and amounts, as well as a location for uploading attachments. We’ll dive into some of these fields below.
You can also save Manual Journals as Drafts, Recurring, and easily void, archive, or add notes and view the history of existing entries. You can read more about all of these features in the Xero Business Help Center. For now we will focus on the three key items small business owners and their bookkeepers need to be including in their entries.

There are three key items that every journal entry should have:

This is the main heading for the entry and serves as any normal title would, to help give you an idea of what’s under the cover. Try to make this title contain key words that someone who knew nothing about your business would understand. Doing so makes the title easily searchable in the future, when its initial purpose has been archived in the back of your brain. Try to include a very general “title” (something you’d remember to use as search terms years later) and then follow those key word(s) with a slightly less general “subtitle”. Example: “Personal Gym Expenses – Refrigerator,” “01.01.2017 Trainer Payroll Adjustment,” and “March 2020 Prepaid Rent Adjustment” are all great titles. Using a very descriptive title will help you to search for these entries in the future using a general term such as “personal expenses” or “payroll” but can also easily see a bit more detail regarding the entry without having to click into it.
In the top left box titled “Narration”
Scenario 1: It’s time to pay your taxes. You look at your list of start-up expenses but something looks off. You know you made some purchases on personal cards and were sure you recorded them with a journal entry. You click into your list of entries to look for the right one except, the titles mean absolutely nothing. You see a long list stating Journal Entry 1, Journal Entry 2, Journal Entry 3, and so forth. Not giving each entry an appropriate title can come back to bite you when looking to review, edit, or copy prior entries.
Scenario 2: Like the example above, it’s time to do your taxes and you need to review your personal expenses. You click into your list of journal entries and see they all have summarized titles. You do a quick search for “Personal Expenses” and find three entries – aha! You forgot to record the refrigerator you purchased for the break room. You adjust in seconds and are ready to send the file to your CPA.
This is the next line of detail after your Narration/Title. The title gives a broad overview of the reason for making the entry whereas the Descriptions are the reason for making each single line item. An example of this would be having three separate line items stating: “3/12/16 Purchase of towels for gym,” “3/15/16 Purchase of refrigerator for break room”, and “March 2016 total Gym Purchases made on Personal Card”. Try to think “Who, What, When, Where, Why” and include any pertinent information in the description.
In the first column titled “Description”
Scenario 1: This is where you can record all sorts of important notes regarding the entry you are making, which is useful to anyone and everyone reviewing your accounting file. Let’s use the refrigerator example above. Add some detail to the record by stating “Refrigerator – Home Depot – GE SN#1234567”. This will allow anyone viewing the file to know why you booked this entry to the “Office Equipment” account and also provide more detail in the case of an audit.
Scenario 2: There’s a second reason this is so important. When viewing a list of transactions from the Income Statement and Balance Sheet, this description is going to show up next to the amount. Having a detailed description in the record will allow anyone reviewing the file to know exactly what a transaction was for and why it was booked a certain way, without having to click through to the journal entry itself and search for more information.
This is the Holy Grail of a well-documented journal entry, the kind of thing your CPA’s dreams are made of. Think receipts, loan statements, cash logs, emails – anything documenting and verifying the reason for making the entry should be added here.
These get added via the grey and blue button in the top right.
Scenario 1: Your CPA wants to know why you booked a $300 piece of equipment to assets. They click into the entry and see a receipt attached – voila! The equipment was actually $3000 and does, in fact, belong in assets. They quickly adjust the dollar amount typo and click save, without having to bother you for details.
Scenario 2: Your state Department of Revenue is performing a use tax audit. They want to make sure that you paid tax on the equipment purchased above. Luckily, you are a documenting superstar! The receipt is attached to the entry and you can send it right over. You can read more about our tips for safe and simple receipt management.
Scenario 3: You recently hired a new bookkeeper, Accountingprose, to review your file for the year. We see a payroll entry that looks a little fishy. This entry was booked back in January and it’s now September. Luckily, the payment report is attached. We see that the employee taxes were booked to employer taxes by mistake. We quickly adjust and continue our review. If this report had been missing, we’d have to reach out to you requesting more information before completing our review and getting you accurate, up to date financials. Locating older reports and receipts can be difficult, so be sure to document what you can as you go along.
Be sure to include a NARRATION (title) containing searchable key words and detail regarding the reason for making the journal entry. Never use generic titles like “Entry 1” but something more specific such as “Start-Up Expenses – January 2017.”
Fill in the DESCRIPTION on each line item to explain why you are creating it. A proper description would be something like “To record Gym Equipment purchase from Bob’s Fitness Center.” Think of providing answers to the age old question, “Who, what, when, where, why?”
Don’t forget to add ATTACHMENTS to the journal entry to back up your information and further explain the purpose of the entry. Great attachments to add are receipts and invoices from the purchases involved.

1 min read
Have you ever looked under the hood of your car and marveled at how all those parts work together to get you from Point A to Point B? Your business's...

Xero Search, a brand new feature, will allow you to find information as quickly as you can type. With Xero Search you can easily access...

Are you a small business owner looking for the right accounting software to manage your finances? Choosing the right accounting software for your...